Showing posts with label chocolate. Show all posts

Friday, January 15, 2016

Rich Chocolate Fudge

Oh chocolate fudge, how I do love you. You are creamy. You are rich. You make me hide batches of you around the house so no one but me knows where you are. I am a squirrel in your presence.

Rich decadent chocolate fudge
No fudge here – move along.

We made fudge a lot when I was a kid. In fact, that original fudge recipe is on this blog, and you can find it here. It doesn't quite taste the same, however, because I think the manufacture of marshmallows has changed since then. When I stumbled upon this variation, I was ecstatic! This tastes exactly how I remember it from childhood! It really is very, very close to the original. I know you will love it, too.

A quick note about marshmallows — do not use old marshmallows, where the bag has been open for awhile. Trust me, freshly opened bags of marshmallows really do make a difference.

Rich Chocolate Fudge
Based on this recipe from Nestlé

Ingredients
3 cups white sugar
1 can evaporated milk
1/4 cup butter
4 cups miniature marshmallows
24 oz chopped bittersweet chocolate
2 teaspoons vanilla extract

Method
  1. Line two 8-inch-square baking pans with foil and set aside.
  2. Combine sugar, evaporated milk, and butter in large saucepan. Bring to a full rolling boil over medium heat, stirring constantly. Boil, stirring constantly, for 4 to 5 minutes. Time it! Remove from heat.
  3. Stir  in marshmallows, chopped chocolate, and vanilla extract. Stir vigorously for 1 minute or until marshmallows are melted. Pour into prepared pans. Refrigerate for 2 hours or until firm. Lift from pan; remove foil. Cut into pieces. Store tightly covered in refrigerator.

Friday, February 14, 2014

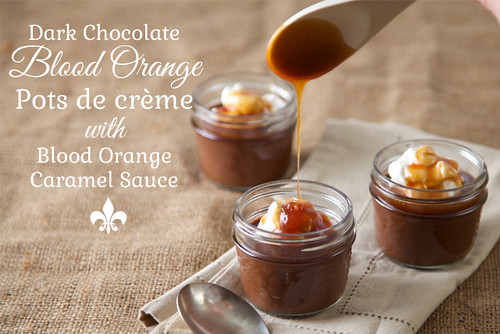
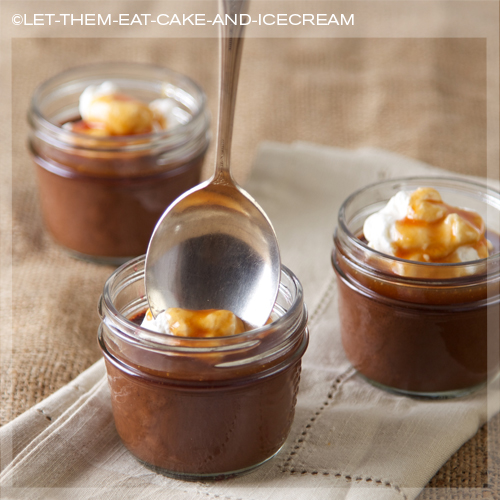
Dark Chocolate & Blood Orange Pots de Crème with Blood Orange Caramel Sauce

Dark Chocolate & Blood Orange Pots de Crème with Blood Orange Caramel Sauce
Happy Valentine's Day, sweeties!

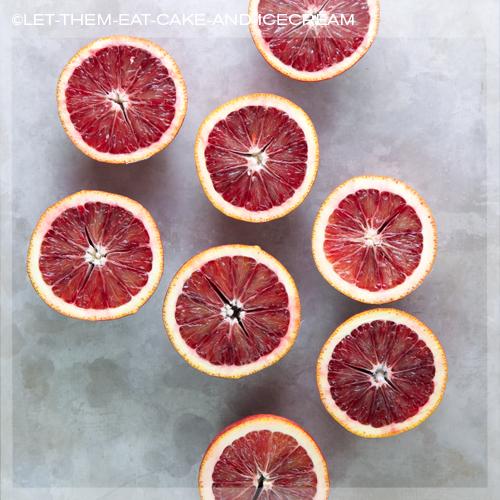
Ingredient Gang Wars: Bloods vs. Dark Chocolate

Are you feeling romantic? Do you have some Plans of Love later today? I am staying home with my sweetie darling, hiding from the Love Fest and all of its heart-shaped pinkness. I sound cynical, but I'm not! We love to go out for date nights, but doing this on Valentine's Day is often more annoying than enjoyable.

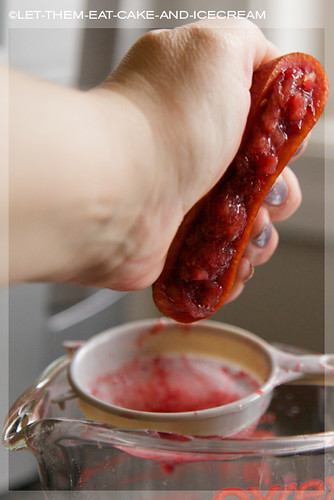
I'm squishing your head!

Squeezed.

My Valentine's Day-at-home will probably look like a nice, home-cooked dinner, followed by a completely rich, decadent, fancy, chocolate dessert. I absolutely love pots de crème — a French custard that falls somewhere between pudding and mousse — and chocolate ones, especially. Just a few mouthfuls are all you need to satisfy that chocolate craving.

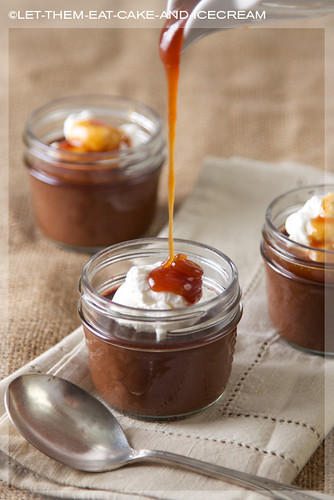
Keep pouring.

I somehow ended up with a bag of blood oranges, and needed a reason to use them. Into the pots de crème they go! The custard itself only uses the zest of one orange, so you can leave that out if you prefer. The blood orange caramel, however, is probably the best caramel I have ever made! You MUST make it. It takes a lot of juice — I needed five oranges to get enough — but the results are amazing. I hooted like a monkey when I tasted it for the first time.

Pass me that PO-duh-CREMM, merci

Instead of a traditional ramekin, I used small canning jars. This amount of custard is perfect — it won't fill you up or weigh you down. You know, in case you will be doing anything, uh, athletic, afterward.

Click through for the recipe and instructions.

Friday, January 31, 2014

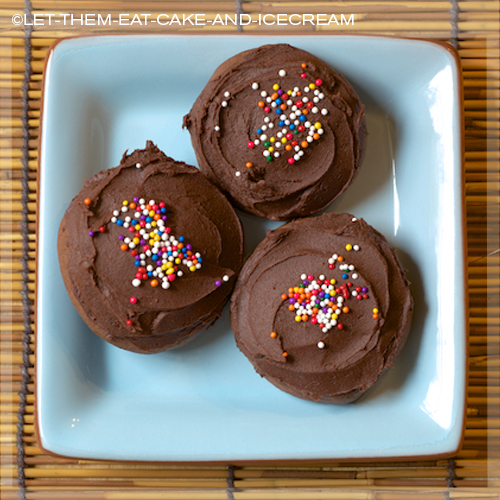
Soft Frosted Chocolate Sugar Cookies


Puffy pillows of chocolate amazingness.


Recently, my husband came home from work with some random store-bought baked good and declared, “these are awesome!” Skeptically, I tasted the offending baked item, and immediately disagreed. Also, (only slightly) offended. He asked me to reproduce the recipe. Of course, he had suggestions — not very helpful suggestions, at that. “Make it more chocolate.” “Make it more different.” “Can you make it taste better?” “I don’t like pink.”

You heard the man.
The candidate for this baker’s makeover was a soft, white sugar cookie with fluffy pink icing, decorated with sprinkles. You know the one! It lives, wrapped in plastic, forgotten on a shelf in your local supermarket’s bakery department. My challenge was to convert this usually stale, dry and chemically-laden sugar bomb into a chocolate delight. Done right, these cookies are tender, full of flavour and not overly sweet. The hit of sweetness comes from the rich chocolate frosting (just a little).
Oh yes, and sprinkles. If you like that sort of thing. (I do.)

Click through for the recipe and instructions.

Friday, December 27, 2013

Black & White Cupcakes

Black & White & Obsessed All Over

I have a new obsession: black & white. Maybe not technically new, but this graphic combination has taken over my life! My recent fave fashion find is a black & white striped tee from Smart Set – the stripes feel so fresh and summery. The latest wheeled addition to our household is a gorgeous little black Mini Cooper, aptly named Oreo. And I have been obsessed with creating the perfect black & white manicure. Leave shades of grey to the steamy novels – I’ll take black & white any day!

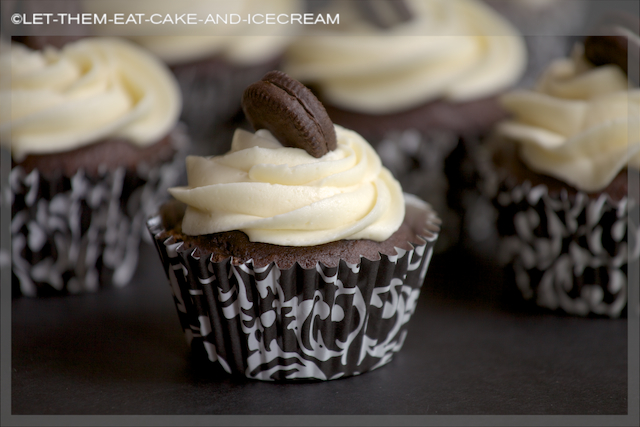
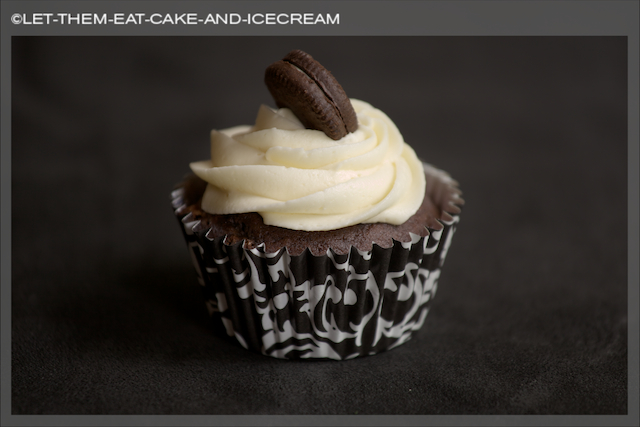
Black & White Cupcakes  
Livin' in perfect harmony
Since black & white is on my mind, I decided to create an easy, delicious Black & White Cupcake to share with my friends and family. The cupcake is a rich, devil’s food chocolate, light and fluffy, and frosted with rich vanilla buttercream. To top it off, I added the ubiquitous black & white cookie — a mini Oreo, of course. 

Click through for the recipe…

Friday, December 20, 2013

Gluten-Free Chewy Chocolate Cookies

Chewy chocolate cookie goodness
I have jumped on gluten-free bandwagon! I started avoiding gluten mostly out of curiosity. I wanted to see if I would feel different, or better, if I didn’t consume it as much as possible. It is still too early to tell, but it hasn’t been as difficult as I imagined it would be.

Stack 'em up – inhale!
This recipe contains no flour, however, it does contain nuts and egg whites, so it is not completely allergy safe. What they are is moist, chewy and packed with amazing chocolate flavour. They are so rich and satisfying that you’ll only need to eat one. OK, maybe two!


Gluten-Free Chewy Chocolate Cookies
Based on this recipe at Martha Stewart.com

Makes 24 cookies
Ingredients
3 cups icing sugar, sifted
3/4 cup cocoa
1/2 teaspoon salt
3/4 cup dark chocolate chips
3/4 cup sweetened shredded coconut
1 cup almonds, chopped and toasted (method below)
4 egg whites

Method
  1. Pre-heat oven to 325°F. Place chopped almonds on a cookie sheet and place in the oven, shaking it occasionally, until fragrant – about 10 minutes. 
  2. In a large bowl, whisk together icing sugar, cocoa and salt until combined. 
  3. Stir in coconut, chocolate chips and toasted almonds and stir until combined. 
  4. Stir in eggs whites very gently until just combined. Do not over mix. 
  5. Drop by heaping tablespoonful onto parchment lined cookie sheets, about 2” apart. 
  6. Bake for 15-18 minutes, turning pans halfway through, until tops of cookies are shiny, cracked and dry to the touch. 
  7. Cool completely on a wire rack. Store in an airtight container.

Monday, November 19, 2012

Candy Bar Brownies

Gooey.... and ALL MINE
After Halloween, I was left with a giant bowl of leftover, fun-sized chocolate bars — a result of last-minute Halloween candy purchasing and my lack of willpower when faced with a bargain. I can’t resist a good deal! Usually, I end up snarfing them all up in a couple of sittings. Instead of eating them all at once, do I give them away, freeze them for later (haha no) or make them into something else? Luckily, I found this brownie recipe that I tweaked until it became something delicious. It uses about 10 fun-sized chocolate bars, or 2 full-sized bars. The brownies are rich and fudgy, and the chocolate bar centre stays soft and liquidy.

Tuesday, October 30, 2012

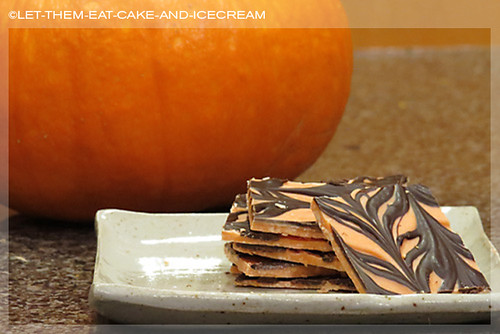
Tiger Butter, Hallowe'en style!

It really does taste exactly like a peanut butter cup!
Here’s a quick, easy candy that tastes just like those famous peanut butter cups in the orange wrapper — my favourite candy from my trick-or-treating days! It’s bright orange & dark brown stripes are perfect for your spooky party. For an elegant variation, skip the peanut butter and add orange extract to the white chocolate.

Friday, September 21, 2012

Chocolate Covered Bacon with Salted Caramel

You had me at.. uh...bacon? Yes. Yes, you did.

Yup. You read that right. Bacon.

Chocolate. Covered. BACON. And, salted caramel.

Oh my Bacon.

(Fans self)

I made this unusual treat for my nephew, a Bacon Fanatic. He proclaimed it "weird", yet squirreled the rest of it away. We never saw it again! (I think he liked it).

This was my first attempt at this kind of candy. I liked it, but I don't think I cooked the bacon enough. I believe this would be more interesting if the bacon was crumbly instead of chewy. Also, I would use milk chocolate next time, instead of semi-sweet. I put a smear of caramel on the bacon and froze the slices before I dipped them in chocolate. The combination of the bacon and salty caramel was darn tasty! I would also like to try this with crunchy peanut butter instead of caramel.

Chocolate Covered Bacon

Ingredients
1/2 package thick cut bacon
8 oz milk chocolate, chopped fine
Caramel sauce or crunchy peanut butter
1 oz white chocolate for embellishment

Method

  1. Cook bacon until crispy. Drain on paper towels, then lay flat on a baking sheet lined with parchment paper and cool in the refrigerator.
  2. Chop milk chocolate (I chop mine in the food processor — so easy!). Melt chocolate in a large bowl placed over a saucepan with about an inch of barely simmering water. Stir gently with a spatula until melted and smooth. Remove from heat.
  3. Spread each piece of bacon with a bit of caramel or peanut butter and lay each bacon strip back on the baking sheet. Place the bacon in the freezer for about 15 minutes to really firm up.
  4. Dip each bacon slice in the melted chocolate. After dipping all the slices, put the bacon back in the fridge or freezer to firm up the chocolate. It doesn't take very long.
  5. Decorate with squiggly lines of melted white chocolate. Or just eat 'em. (I did.)


Sunday, June 17, 2012

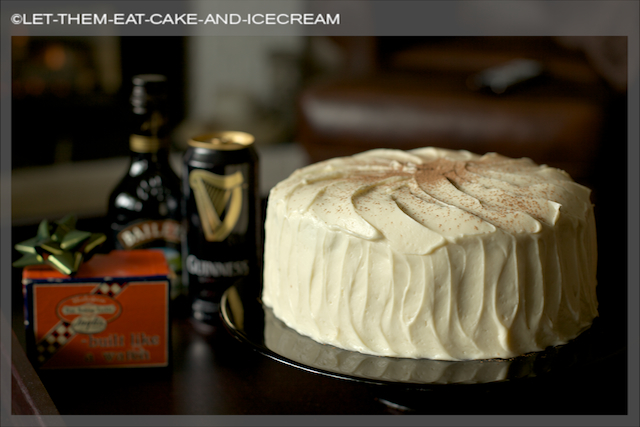
Manly Desserts: Guinness Chocolate Cake with Bittersweet Chocolate Ganache and Bailey's Cream Cheese Frosting

Manly Guinness Chocolate Cake for Manly Men
Happy Father's Day! Today, we celebrated dear, old Dad. Many of you spent the day with Dad, as I did, participating in his favourite activities, or Dadtitivies. Golfing, fishing, boating, hunting, NASCAR — all the manly-man things Dad does anyway, but on Father's Day we get to go with him.

My Dad chose his favourite activity — lunch. The apple doesn't fall far from the tree as that's my favourite activity, too. We took him to his favourite lunch spot (Tim Horton's), and then back home for a home-baked treat.

Friday, June 1, 2012

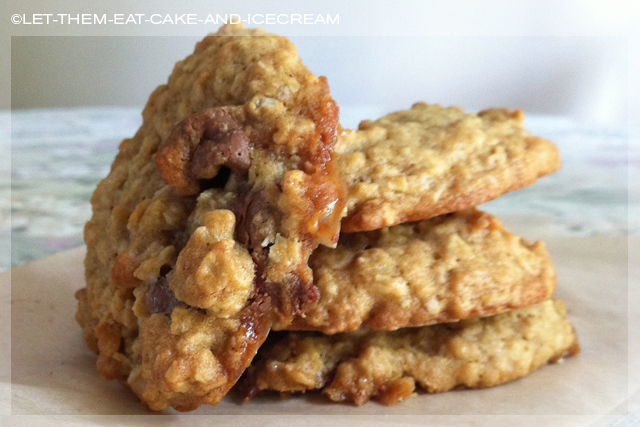
Oatmeal Rolo Cookies


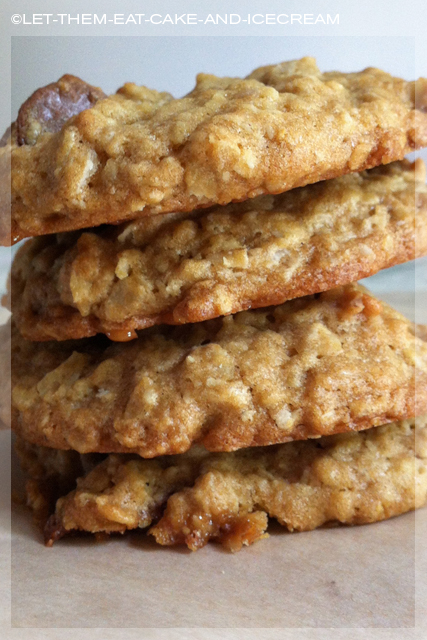
Soft 'n' chewy Oatmeal Rolo Cookies

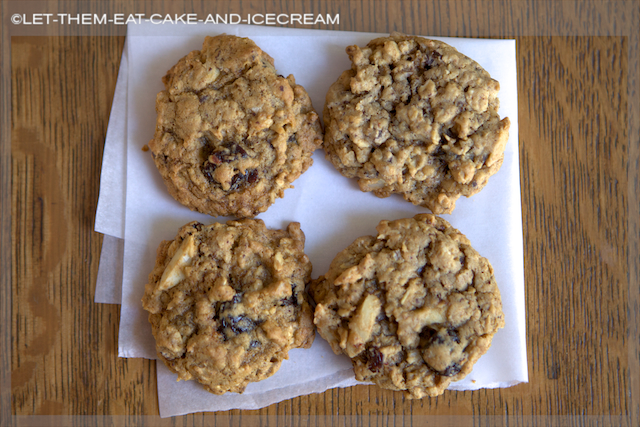
One day at work, I was discussing the awesomeness of oatmeal cookies with my friend and co-worker, and the age-old debate of Raisins vs. Chocolate Chips came up. I am a raisin fan, while my friend is in on Team Chocolate Chip. I was defending the raisin version when she said, "But have you ever tried oatmeal cookies with mini Rolos in them?"

Doesn't everyone have baking debates at work?
My eyes glazed over and my jaw hung open stupidly while I pictured just that: soft, chewy oatmeal cookies studded with droplets of caramel-filled chocolate cups. "Challenge accepted," I vowed. I went to the store that very day and picked up a package of Mini Rolos.

Mini Rolo candies! Mmmmmm....

Saturday, May 12, 2012

Nutella Cheesecake Twists


Twisting ribbons of Nutella and cheesecake filling wind through this delicious pastry.


Rich, chocolatey Nutella. Smooth, tangy cheesecake. Flaky pastry. Do I have your attention yet? As a good friend recently said to me, "You had me at Nutella."


Saturday, April 21, 2012

Chocolate Cracker Toffee

You won't be able to eat just one. Or one dozen.

I am in love with Pinterest.

I love spending time pinning interesting photos, recipes, outfits, houses and vacation spots. I have spent billions of imaginary dollars decorating fabulous rooms and buying pretty clothes. I also get many ideas for recipes I would never have otherwise thought about. Here is one such recipe I found, tried, and fell in love with — Cracker Toffee.

Sunday, February 26, 2012

Sugar High Sunday: Chocolate Bars

Why spend all that money on commercial chocolate bars when you can make your own? That way, you know exactly what's in them — no chemical surprises!

Here are a few recipes I found. Let me know if you try them and how you like 'em!

Homemade Snickers Bars from How Sweet It Is!

This could be Twix Bars — Salted Caramel Chocolate Shortbread from Annie's Eats

Not technically a candy bar, but Pop Tarts sure are a yummy treat! Make them yourself, courtesy of Hello Hanna.

Did you call it a Ding Dong, a Ring Ding or a Devil Dog? Whatever you called it, these delicious cream-filled chocolate cupcakes will take you back! Here's a recipe from Bean Town Baker to help you get started.

Here's a gluten-free Reese's Peanut Butter Cup from famous pastry chef, Stella Parks aka Brave Tart. Yummmmy!

Do you like to recreate famous candy bars at home? Which ones have you tried?

Cheers,
Lulu xoxo

Sunday, January 15, 2012

Heart-Healthy Chocolate Cherry Cookies

Chocolate Cherry Oatmeal Cookies with almonds – perfect with a cup of tea.

Happy New Year! If you are like me, you may have included 'eating healthier' in your New Year's resolutions. Eating healthier meals doesn't necessarily mean that you need to stop enjoying dessert! Besides including lots of fresh fruit in your diet, you can easily whip up some of these heart-healthy cookies for a special treat.

Health Benefits
Dried Cherries: I used dried Montmorency cherries in my cookies. Montmorencies are tart, or sour, cherries. Cherries are high in the powerful antioxidant anthocyanin, which has been shown to be beneficial in preventing many diseases, including cancer. Dried tart cherries also contain high levels of melatonin, which can help regulate sleep and slow the aging process.

Dark Chocolate: Dark chocolate is also high in antioxidants. Chocolate increases blood flow to your brain and heart. It can help control blood sugar. Chocolate is high in the minerals potassium, copper, magnesium and iron. It also makes you feel happier by elevating your mood. And it tastes great!

Oatmeal: Oatmeal contains a fiber called beta-glucan. Including more oatmeal in your diet can lower cholesterol, boost immunity, and stabilize blood sugar. Oatmeal also is high in magnesium, which can reduce the risk of type 2 diabetes.

Almonds: Almonds are high in the antioxidant Vitamin E, cholesterol-lowering monounsaturated fats and are a good source of protein. Almonds also contain Vitamin B2 (riboflavin), manganese and copper. Don't care for almonds? Substitute walnuts, pecans or chestnuts; all of which are also high in good fats and antioxidants.

Chewy little yummy nummies

I found these cookies to be a little too mounded, so I flattened them with a spatula slightly before baking. The dried cherries I bought were really huge; next time I will chop them up. I'm not a fan of chopping chocolate, so I might use dark chocolate chips next time.

I hope you enjoy these heart-healthy cookies!
I ate four. They're healthy, so it's OK. Right? Anyone?
Heart-Healthy Chocolate Cherry Cookies
Based on a recipe by Cooking Light
Makes 42 small cookies

Ingredients
1/3 cup all-purpose flour
1/3 cup whole-wheat flour
1 1/2 cups old-fashioned rolled oats
1 teaspoon baking soda
Pinch of salt
6 tablespoons butter
3/4 cup packed dark brown sugar
1 cup dried cherries (chopped up if you like smaller bits)
2 teaspoons vanilla extract
1 large egg, lightly beaten
3 ounces bittersweet chocolate, coarsely chopped (or 1/2 cup dark chocolate chips)
1/2 cup slivered blanched almonds

Method
  1. Preheat oven to 350°.
  2. Combine flours, oats, baking soda and salt in a large bowl; stir with a whisk.
  3. Melt butter in a small bowl. Mix in brown sugar, stirring until smooth. Add sugar mixture to flour mixture; beat with a mixer at medium speed until well blended. Add cherries, vanilla, and egg; beat until combined. Fold in chocolate and almonds. Drop dough by tablespoonfuls 2 inches apart onto baking sheets coated with cooking spray. Bake at 350° for 8 minutes. Cool on pans 3 minutes or until almost firm. Remove cookies from pans; cool on wire racks.
Nutritional Information
Amount per cookie (based on 42 cookies)
Calories: 67
Fat: 2.3g
Saturated fat: 1.1g
Monounsaturated fat: 0.43g
Polyunsaturated fat: 0.14g
Protein: 1.2g
Carbohydrate: 11.2g
Fiber: 0.9g
Cholesterol: 7.1mg

Monday, December 12, 2011

12 Days of Christmas Baking! Day 12: Chocolate Truffles

Day 12: Chocolate Truffles


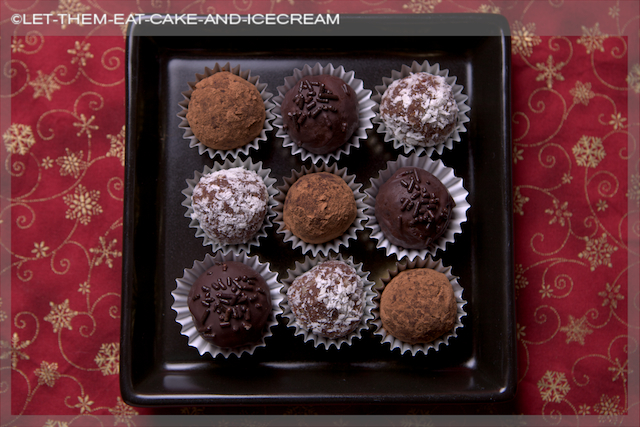
Truffles are the most decadent candy. Named for the rich fungus they resemble, the irregular shapes are such an explosion of chocolateness that your brain will implode into a singularity.
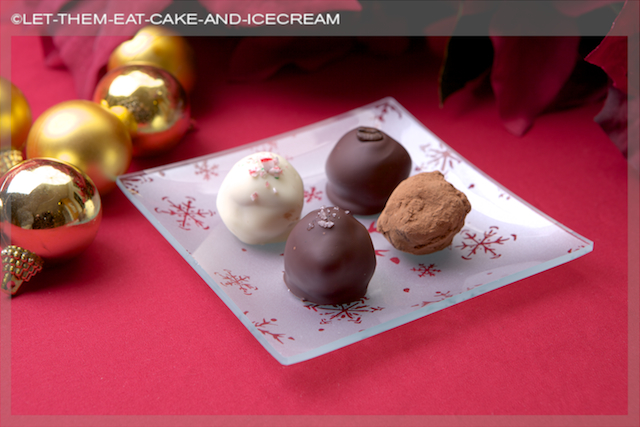
Which one would you choose?

When making these truffles, I noticed one thing. The ones with the liqueur in them were definitely easier to form into balls than the ones without liqueur. I would recommend that you definitely use liqueur; but if you don't, you should increase the cream by 1/4 cup.

Clockwise from top: Candy Cane, Kahlua, Dark Chocolate, Salted Caramel.

I made four kinds: Salted Caramel – caramel-flavoured truffle, coated with bittersweet chocolate and filled with dulce de leche and sprinkled with fleur de sel; Candy Cane – peppermint-flavoured truffle, coated with white chocolate and sprinkled with crushed candy canes; Kahlua, coated with bittersweet chocolate and topped with a coffee bean; and Dark Chocolate, coated with cocoa.

I put tiny blobs of dulce de leche on a parchment-lined baking sheet and froze it. This doesn't actually make it solid, but does harden it a bit so you can wrap it in a truffly blanket.

The secret dulce de leche centre in the Salted Caramel truffle.

I used these flavourings from LorAnn, which are more potent than extracts.

Chocolate Truffles

Ingredients
12 oz. bittersweet chocolate
1 cup heavy cream
Options:
1/4 cup flavoured liqueur (I used Kahlua)

Flavourings, such as peppermint, etc.

Coatings:
8 oz. bittersweet chocolate or white chocolate
Cocoa powder
Icing sugar

Method
  1. In a food processor, chop chocolate until it becomes fine crumbs.
  2. Heat cream in a small saucepan on the stove over medium heat, until it just comes to the boil.
  3. While processor is running, pour in hot cream. Blend until chocolate is completely melted.
  4. Add flavorings or liqueur, mix until completely combined.
  5. Chill chocolate mixture in refrigerator for a few hours or overnight. Using a melon baller, or small scoop, form chilled chocolate into balls. 
  6. Dip in melted chocolate to coat; or roll in cocoa or icing sugar.

Saturday, December 10, 2011

12 Days of Christmas Baking! Day 10: Rum Balls

Day 10: Rum Balls


Rum Balls
Based on a recipe by Joyofbaking.com


Ingredients1 1/2 cups toasted nuts, finely chopped (hazelnuts, walnuts, or almonds can be used)
1 1/4 cups finely crushed vanilla wafer cookies
1/2 cup icing sugar
2 tablespoons cocoa powder
2 tablespoons light corn syrup
1/4 cup rum

Toppings
Icing Sugar
Finely chopped nuts (pecans, walnuts, hazelnuts, almonds or pistachios)
Unsweetened Cocoa Powder
Melted Dark Chocolate
Sweetened shredded coconut

Method
  1. Combine chopped nuts & vanilla crumbs in a bowl.
  2. Add icing sugar and cocoa and combine.
  3. Add corn syrup and rum and combine until a nice glistening dough ball is formed. Refrigerate for about an hour.
  4. Using a measured scoop, small spoon or melon baller, scoop out some dough and roll it into a ball, placing the balls on parchment paper-lined baking sheets.
  5. Coat with your favorite coating and enjoy!

Sunday, December 4, 2011

12 Days of Christmas Baking! Day 4: Nanaimo Bars

Day 4: Nanaimo Bars

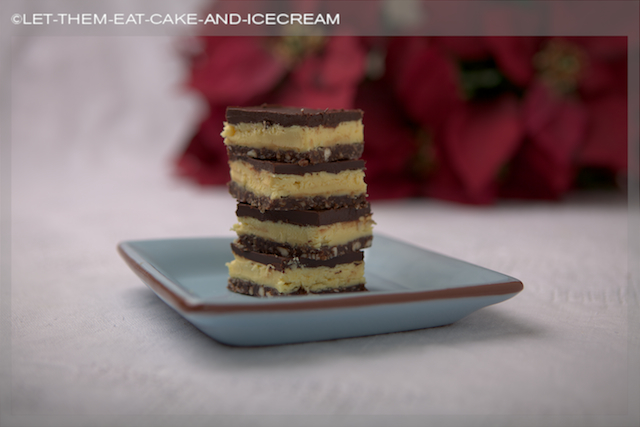
Sweet 'n' creamy 'n' chewy; just like me.
Nanaimo bars, a no-bake layered bar dessert, are quintessentially Canadian and popular hereabouts around Christmas time. If you have insomnia, you can read more about the history of Nanaimo Bars here.

The bars take a lot of ingredients, but they are essentially easy to make. You make the bars in stages, starting with the base. Then, the creamy middle layer is spread over the base. Try not to eat any, I dare you. Finally, melted chocolate is poured over the top. Chill, slice, and inhale.

If these are new to your understanding, please make them and let me know how you liked them! They are a favourite around here, and don't last long.

Nanaimo Bars
Based on a recipe by Deanna Horn
Makes one 9 x 13 inch tray of bars

Ingredients
Base
1 cup butter
1/2 cup granulated sugar
10 tablespoons cocoa powder
1 teaspoon vanilla
2 eggs, lightly beaten
2 cups sweetened shredded coconut
1 cup sliced almonds
1 cup graham cracker crumbs

Middle Layer
1/2 cup butter
4 cups icing sugar, sifted
4 tablespoons vanilla custard powder
6 tablespoons milk

Top Layer
1/2 cup butter
8 oz. bittersweet chocolate, chopped

Method
Prepare Base
In a saucepan on medium heat, melt butter, sugar, cocoa and vanilla together and stir until smooth. Add beaten eggs, stir until combined; remove from heat. Add coconut, almonds and graham cracker crumbs; stir together. Spread mixture onto the bottom of a 9 x 13 inch pan. Refrigerate. 

Prepare middle layer
In a stand mixer, cream butter until light and fluffy. Add icing sugar and custard powder. Cream together until light and fluffy. Add milk, beat on medium high until fluffy. Spread over base layer. Refrigerate.

Prepare top layer Melt chocolate and butter together, mix until smooth. Pour over middle layer and spread evenly to coat. Refrigerate.
Cut into bars and enjoy.

**Edited to fix the instructions for preparing the base. Thanks, all of you who pointed it out!

Friday, December 2, 2011

12 Days of Christmas Baking! Day 2: Chocolate Marshmallow Fudge

Day 2: Chocolate Marshmallow Fudge
Here come the fudge!

When we were growing up, my sister and I had a specific Christmas baking duty:

Stir The Fudge Pot

We had a special pot for it and everything: The Fudge Pot. An ancient, heavy-bottomed stock pot — whose bakelite handles had long-since shattered and flaked away; ancient burnt sugar stains flecked the pitted bottom. And a special Fudge Spoon — a warped but very sturdy wooden spoon.

We would stand on chairs, stirring and stirring, while the fudge got thicker and thicker, until our tiny arms were burning. It was only six minutes, but it seemed to take forever. Time stood still and it was the NOWness of the bubbling sugar, and the endless, endless, stirring, that filled my whole frontal lobe.

"Is it time yet?" we would call. "No, four minutes left," Mom would say patiently.

The sugary mixture got darker and darker. Bubbles blatted their way to the surface, one after the other.

Three minutes, two minutes, one minute left. Sweat on our brows, we would whine, "I can't do it!" and suddenly the fudge would be done. Quickly! Quickly! Throw in butter, chocolate and vanilla. Quickly! Stir, stir, stir. Quickly! Pour that stiffening chocolate wonderfulness into the pan. It smelled like some kind of heaven.

The best part? We always got to lick the spoon. Always.

I am not sharing.


Chocolate Marshmallow Fudge
by Barbara Rogalsky

Ingredients
3/4 cup evaporated milk
2 cups granulated sugar
About 20 large marshmallows (5.5 oz)
1/2 cup butter
6 oz. bittersweet chocolate, chopped
1 teaspoon vanilla

Method

  1. In a large, heavy-bottomed stock pot, mix together evaporated milk, sugar and marshmallows.
  2. Bring to a boil over medium heat, stirring constantly until mixture is bubbling and marshmallows begin to melt.
  3. Once bubbling, allow turn heat down to just below medium and continue boiling for exactly 6 minutes. Mixture will start to turn golden.
  4. Remove from heat and immediately stir in butter, chocolate and vanilla.
  5. Pour into an 8 x 8 inch pan lined with parchment paper or aluminum foil. Chill to firm up in refrigerator. Cut into 1 inch squares, serve at room temperature.


Options
Swap bittersweet chocolate for dark chocolate, mint chocolate, etc. Add different flavorings instead of vanilla, for example, maple or coffee.

Thursday, December 1, 2011

12 Days of Christmas Baking! Day 1: Church Windows

Welcome to Let Them Eat Cake's 12 Days of Christmas Baking!

Christmas is coming — don't you smell the chestnuts roasting?

DON'T YOU ?!?

No need to panic. As my Christmas gift to you, I will post a new Christmas baking treat every day for the next 12 days. Coming up: cookies, candies, bars and lots of chocolate! I hope you will find a recipe to share with your family and friends, and become part of your holiday baking repertoire.

My mother loved Christmas. As children, my sister and I would be her helper elves. We would be her baking assistants in the kitchen, cutting and decorating cookies or stirring fudge; we would sit together at the kitchen table making hand-made ornaments for the tree; and she would help us make hand-made gifts for each other. We would listen to Christmas music albums: Bing Crosby and Harry Belafonte crooned while we drank hot cocoa with tiny marshmallows. Some of the ornaments we made still exist and now grace my Christmas tree each December.

We lost our Mom to cancer 18 years ago, but we still continue her traditions as much as we can today. She taught us that the season is about sharing and family and making do with what you have. May you find warm moments of peace and friendship, no matter how hectic and stressful life can get.

Much love,
Lulu

Churchy church windows are churchy. Delicious, without the pesky broken glass and lead poisoning. You're welcome.


Day 1: Church Windows


Chocolatey slices of colorful marshmallows resemble stained-glass windows, and the coating of shredded coconut is reminiscent of a light dusting of Christmas snow. This no-bake slice is one of my favourite Christmas treats, and is something that my Mom, my sister and I would make together every year.

Church Windows
by Barbara Rogalsky

Ingredients
4 oz. semi-sweet chocolate, melted and cooled slightly
2 tablespoons butter
1 egg, beaten lightly
1 cup icing sugar
4 cups miniature coloured (fruit-flavoured) marshmallows
1 teaspoon vanilla
1/3 cup chopped walnuts (optional)
1/2 cup sweetened shredded coconut


Method
  1. Melt chocolate with butter, cool slightly. Mix in beaten egg, stir until combined. Stir in icing sugar and vanilla until combined. Fold in marshmallows and nuts (if using).
  2. Spread mixture on a large piece of parchment or wax paper. Using the wax paper, form mixture into a rolled log about 4" thick. Coat with coconut.
  3. Freeze log for about an hour. Remove from freezer and slice into 1/2" thick slices. Keep church windows in a sealed container and refrigerated. 
Makes about 2 dozen slices.

Special thanks to Lesa, Mimi and Cam for being my kitchen assistants; and to Robin, ÜberHusband, for taking such brilliant photographs and being generally awesome.

Friday, November 11, 2011

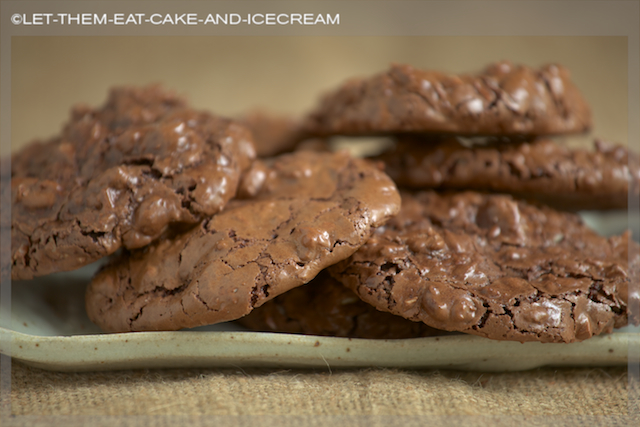
Chocolate Espresso Cookies

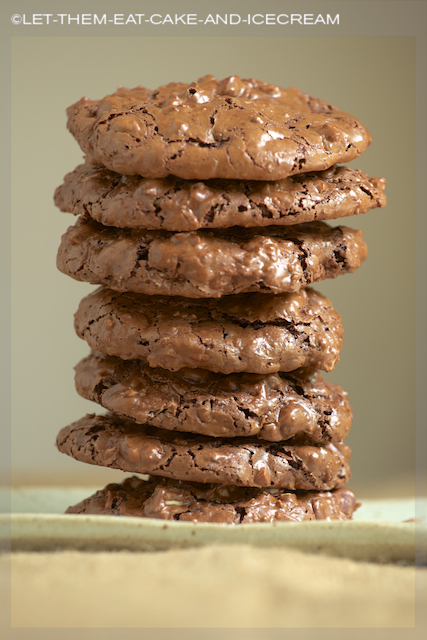
Unhinge jaw. Inhale cookie stack.

I am a coffee girl.

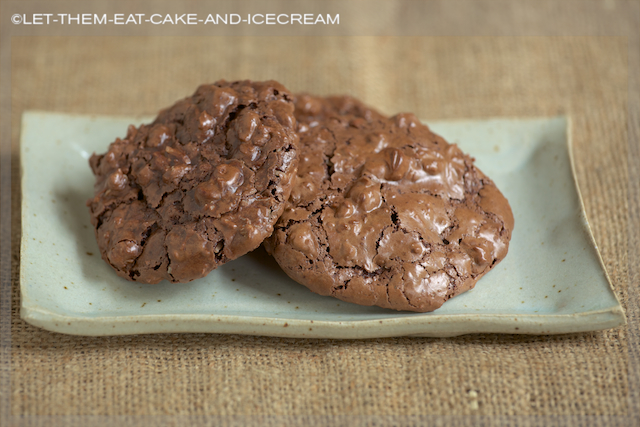
In the morning, it usually takes at least two cups of coffee before my eyes can focus and I can form complete sentences. I also love chocolate — so, coffee and chocolate together? Pure heaven. These shiny, chewy chocolate cookies pack a huge chocolate whollop, with a sweet kick of coffee. Getting the right grind on your beans will be the key to your success — the finer the grind, the better.