Tuesday, December 13, 2011

12 Days of Christmas Baking! The Credits

The Credits, and a little break

This has been a whirlwind 12 days of baking! I would like to take a moment here to thank everyone involved in my little endeavor.

Photography, Baking Assistant, Emotional Support, Patter-on-the-back: Robin Horn
Robin's amazing photography makes the usual look stunning and new. When Robin's not taking photos of yummy desserts, he's somewhere in the great outdoors, photographing birds, wildlife and our beautiful local scenery. You can view more of Robin's photos on his Flickr page, here.

Baking Assistants
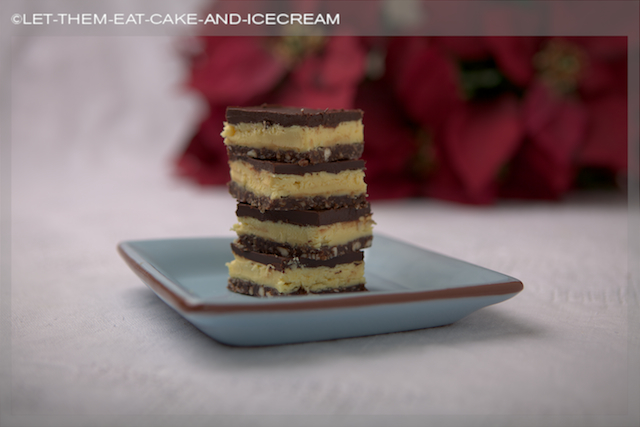
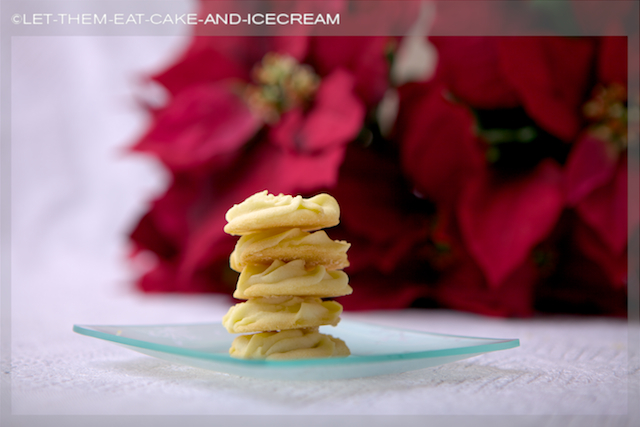
My lovely sister, Lesa, and her two charming kids, Mimi and Cam. They helped me, one Sunday, crank out a whole bunch of desserts, specifically; nanaimo bars, fudge, shortbread and church windows. They helped set the momentum for the rest of the series.

Inspiration
The following websites and blogs really inspired me; I hope they will inspire you, too.


A little break
So, I'm taking a little break over the Christmas holidays. I am looking forward to some gift shopping, visiting with friends and family, and taking it easy. I will return in early January, with a few changes to the website.

I would like to raise my glass to you, dear readers, for following my little blog. I love all your comments and suggestions – keep them coming!

Cheers!

Christmas kisses from Robin & Lulu!


xoxo,
Lulu

Monday, December 12, 2011

12 Days of Christmas Baking! Day 12: Chocolate Truffles

Day 12: Chocolate Truffles


Truffles are the most decadent candy. Named for the rich fungus they resemble, the irregular shapes are such an explosion of chocolateness that your brain will implode into a singularity.
Which one would you choose?

When making these truffles, I noticed one thing. The ones with the liqueur in them were definitely easier to form into balls than the ones without liqueur. I would recommend that you definitely use liqueur; but if you don't, you should increase the cream by 1/4 cup.

Clockwise from top: Candy Cane, Kahlua, Dark Chocolate, Salted Caramel.

I made four kinds: Salted Caramel – caramel-flavoured truffle, coated with bittersweet chocolate and filled with dulce de leche and sprinkled with fleur de sel; Candy Cane – peppermint-flavoured truffle, coated with white chocolate and sprinkled with crushed candy canes; Kahlua, coated with bittersweet chocolate and topped with a coffee bean; and Dark Chocolate, coated with cocoa.

I put tiny blobs of dulce de leche on a parchment-lined baking sheet and froze it. This doesn't actually make it solid, but does harden it a bit so you can wrap it in a truffly blanket.

The secret dulce de leche centre in the Salted Caramel truffle.

I used these flavourings from LorAnn, which are more potent than extracts.

Chocolate Truffles

Ingredients
12 oz. bittersweet chocolate
1 cup heavy cream
Options:
1/4 cup flavoured liqueur (I used Kahlua)

Flavourings, such as peppermint, etc.

Coatings:
8 oz. bittersweet chocolate or white chocolate
Cocoa powder
Icing sugar

Method
  1. In a food processor, chop chocolate until it becomes fine crumbs.
  2. Heat cream in a small saucepan on the stove over medium heat, until it just comes to the boil.
  3. While processor is running, pour in hot cream. Blend until chocolate is completely melted.
  4. Add flavorings or liqueur, mix until completely combined.
  5. Chill chocolate mixture in refrigerator for a few hours or overnight. Using a melon baller, or small scoop, form chilled chocolate into balls. 
  6. Dip in melted chocolate to coat; or roll in cocoa or icing sugar.

Sunday, December 11, 2011

12 Days of Christmas Baking! Day 11: Gingerbread Cookies

Day 11: Gingerbread Cookies


This is the very best gingerbread I have ever tasted. They are spicy and flavorful, with a nice chewy texture.


Gingerbread Cookies
Based on a recipe from Martha Stewart Living

Ingredients
Cookies:
3 cups all purpose flour
1/2 teaspoon baking soda
1/4 teaspoon baking powder
1/2 cup unsalted butter
1/2 cup dark brown sugar, packed
2 teaspoons ground ginger
2 teaspoons ground cinnamon
3/4 teaspoon ground cloves
1/2 teaspoon finely ground black pepper
3/4 teaspoon salt
1 egg
1/2 cup fancy molasses

Royal Icing:
2 1/2 cups icing sugar
2 1/2 tablespoons meringue powder
scant 1/4 cup water

Method
  1. Cookies: In a large bowl, sift together flour, baking soda and baking powder; set aside.
  2. In the bowl of a stand mixer, cream butter and sugar until light and fluffy. Stir in spices and salt until combined. Add egg and molasses and stir until combined.
  3. Add flour mixture on low speed. Chill dough for about an hour.
  4. Pre-heat oven to 350° F.  Roll out dough to about 1/8" thick and cut out shapes with cookie cutters. Place cookies on parchment-lined baking sheets. Bake for about 8 to 10 minutes. Cool completely before decorating.
  5. Icing: In the bowl of a stand mixer, blend icing sugar and meringue powder until combined. Slowly add water until combined. Beat for 10 minutes.
  6. Put icing into piping bag with a small round tip. Pipe designs onto cookies, then sprinkle with decorative sugar or sprinkles.


Saturday, December 10, 2011

12 Days of Christmas Baking! Day 10: Rum Balls

Day 10: Rum Balls


Rum Balls
Based on a recipe by Joyofbaking.com


Ingredients1 1/2 cups toasted nuts, finely chopped (hazelnuts, walnuts, or almonds can be used)
1 1/4 cups finely crushed vanilla wafer cookies
1/2 cup icing sugar
2 tablespoons cocoa powder
2 tablespoons light corn syrup
1/4 cup rum

Toppings
Icing Sugar
Finely chopped nuts (pecans, walnuts, hazelnuts, almonds or pistachios)
Unsweetened Cocoa Powder
Melted Dark Chocolate
Sweetened shredded coconut

Method
  1. Combine chopped nuts & vanilla crumbs in a bowl.
  2. Add icing sugar and cocoa and combine.
  3. Add corn syrup and rum and combine until a nice glistening dough ball is formed. Refrigerate for about an hour.
  4. Using a measured scoop, small spoon or melon baller, scoop out some dough and roll it into a ball, placing the balls on parchment paper-lined baking sheets.
  5. Coat with your favorite coating and enjoy!

Friday, December 9, 2011

12 Days of Christmas Baking! Day 9: Mini Pecan Tarts

Day 9: Mini Pecan Tarts

Do you love pecan pie? I do! These tiny pecan jewels and the sweetest bite of pecan pie, in one delectable morsel. They will look beautiful on any holiday party tray.

Who doesn't love a little tart? ;-)
 
Mini Pecan Tarts 

Makes about 3.5 dozen
Ingredients
1 cup margarine
6 oz. cream cheese, softened
2 cups all-purpose flour
1 egg
1-1/4 cups dark brown sugar, packed
1-1/2 tablespoons melted butter
1/4 teaspoon vanilla extract
Pinch of salt
3/4 cups chopped pecans

Method
  1. Pre-heat oven to 350° F. 
  2. In a stand mixer, cream together margarine and cream cheese until fluffy. Beat in flour, a little at a time, until a smooth dough ball is formed. 
  3. Roll dough into small balls, then press dough into a mini muffin pan, making sure the dough is even on the bottom and the sides. 
  4. In another bowl, mix together eggs, brown sugar, butter, vanilla and salt. Mix in pecans. Using a small spoon, fill each crust about 2/3 full with pecan mixture. 
  5. Bake for about 15 minutes or until crust turns slightly brown and filling has puffed up. Cool and store in an air-tight container.

Thursday, December 8, 2011

12 Days of Christmas Baking! Day 8: Cashew Cookies with Dulce de Leche

Day 8: Cashew Cookies with Dulce de Leche Filling

Dulce de leche, or literally, sweet milk, is a creamy caramel from Latin America. I recently learned that I could make my own — and these cashew cookies sprang to mind. 

Muy delicioso!
Making the dulce de leche was really easy, but time consuming. Basically, cook cans of sweetened condensed milk in a crock pot or slow cooker on low for about 8 hours, then turn off the pot and leave it to cool overnight until completely room temperature. For a complete tutorial, here is the one I followed at Taylor Takes Taste.

You can also buy it. Here in Canada, you can find it easily at The Real Canadian Superstore.

The cashew cookies are completely amazing on their own, but when sandwiched around dulce de leche? Oh boy, you won't believe how good they are! For the best results , use dry roasted, salted cashews. If you can't find those and get plain cashews, slightly toast them in a dry pan and add 1/4 teaspoon sea salt to the cookie batter.

Cashew Cookies with Dulce de Leche Filling
Based on a recipe by Martha Stewart Living

Makes 5 dozen cookies, or 2.5 dozen sandwiches
Ingredients
1-2/3 cups all-purpose flour
1/2 teaspoon sea salt
2-1/2 cups roasted, salted cashews
2 tablespoons plus 1 teaspoon canola oil
1/2 cup unsalted butter
3/4 cup light brown sugar, packed
1/2 cup sugar
1 egg
1 teaspoon vanilla extract
1 cup dulce de leche

Method
  1. Pre-heat oven to 350°F. 
  2. Mix flour and salt together in a bowl; set aside. Chop 1 cup of the cashews; set aside. 
  3. In a food processor, mix remaining cashews until finely chopped. Slowly pour in oil and continue processing until creamy, about 2 minutes. 
  4. In a stand mixer, mix together cashew mixture, butter and both sugars until fluffy; about 2 minutes. Mix in egg and vanilla. 
  5. On low speed, gradually add flour and mix until just combined. Stir in chopped cashews. 
  6. Using a small scoop or tablespoon, drop dough onto parchment-lined baking sheets, about 2 inches apart. 
  7. Bake for 6 minutes. Remove from oven and gently flatten with a spatula. Return to oven and bake for another 6 minutes or until golden. Cool on wire racks. 
  8. Spoon a dollop of dulce de leche onto the bottom of one cookie, then place another cookie on top so that the bottoms are facing together. Press together to make a sandwich.

Wednesday, December 7, 2011

12 Days of Christmas Baking! Day 7: Walnut Cookies

Day 7: Walnut Cookies

Nuts are a special ingredient around the holidays. Due to their cost, we only use them around special occasions. These crispy, nutty cookies have an irresistible rum glaze that makes them very special, indeed. I always get requests for these. I hope you like them! 

Rum and nuts: sounds like a pirate party!

Walnut Cookies Makes about 5 dozen cookies.
Ingredients
Cookies
1-1/2 cups walnut pieces
2 tablespoons slivered almonds
1 egg
1 cup sugar
1/4 teaspoon baking powder
1/2 teaspoon vanilla
1/2 teaspoon ground cinnamon
Pinch ground cloves
Juice of 1/2 lemon
1 tablespoon fresh lemon zest
1-1/2 cups walnut halves 

Rum Glaze
3/4 cups icing sugar
3 tablespoons rum

Method
  1. Pre-heat oven to 375°F. Line baking sheets with parchment paper. 
  2. Chop walnut pieces and almonds. 
  3. In a stand mixer, beat egg and sugar until foamy, about 2 minutes. Add baking powder, vanilla, cinnamon, cloves, juice and zest and mix until combined. Stir in nuts until combined. 
  4. Drop by measuring teaspoon onto prepared baking sheets, spacing about 2" apart. Place a walnut half on top of each cookie. 
  5. Bake for about 10-12 minutes, or until semi soft. Cool cookies on rack. 
To make glaze
  1. Whisk rum and icing sugar together until smooth. Brush glaze over cookies.

Tuesday, December 6, 2011

12 Days of Christmas Baking! Day 6: Coconut Lime Bars

Day 6: Coconut Lime Bars

Lime is one of the scents that evokes the holidays for me. Along with mandarin oranges and clementines, limes were always prevalent in our house for special occasions. One of my favourite cocktails at Christmas is the gin & tonic; with tons of limes, of course!
Put the lime in the coconut! And mix it all up!
These bright and chewy bars have a rich, buttery shortbread crust. The lime centre packs a limey whollop; and the coconut adds a sweet, chewy counterbalance to the acidic limes.

If you like lemon bars, you will love these coconut lime bars.

Coconut Lime Bars 
Makes one 9 x 13 inch tray of bars.
Crust
1-3/4 cups all-purpose flour
1/2 cup light brown sugar, packed
1/4 teaspoon salt
1 cup unsalted butter, cut into cubes

Filling
1-1/2 cups sweetened shredded coconut
2 cups sugar
1/4 cup all-purpose flour
4 eggs
1/2 cup freshly squeezed lime juice (about 4-5 limes)
Zest from one lime
Icing sugar for dusting

Method
  1. Pre-heat oven to 350°F. Line a 9 x 13 inch pan with aluminum foil or parchment paper. 
To make crust
  1. In a food processor, mix together flour, sugar, salt, and butter. Pulse until combined and resembles very coarse crumbs. Pour mixture into the prepared pan and press mixture down with your hand until even. 
  2. Bake bottom layer for about 20 minutes, until edges begin to turn colour. Remove from oven, but leave oven on. 
To make filling
  1. Sprinkle half of the coconut over baked crust. In a food processor, mix together sugar, flour, eggs, lime zest and lime juice until blended. Or whisk together in a small bowl. Pour mixture into pan. Sprinkle remaining coconut over top. 
  2. Bake in oven for 25 to 30 minutes, or until top is set. Cool completely. 
  3. Lift cooled bars out of pan using aluminum foil or parchment paper. Dust bars with icing sugar. Cut into bars.

Monday, December 5, 2011

12 Days of Christmas Baking! Day 5: Raspberry Almond Thumbprint Cookies

Day 5: Raspberry Almond Thumbprint Cookies
You know you want it.
I have a really hard time resisting these Raspberry Almond Thumbprint cookies. To me, they are like the crack-cocaine of the holiday table. Um, not that I know what that is.

Anyhoo, back to the cookies. Yes, they are addictive. As my good buds The Borg says, "Resistance is Futile". I hope you like these as much as I do.

Raspberry Almond Thumbprint Cookies
Ingredients
Cookies
2/3 cup sugar
1 cup butter
1/2 teaspoon almond extract
2 cups all-purpose flour
1/2 cup raspberry jam (I use Smucker's seedless raspberry jam)

Glaze
1 cup icing sugar
1-1/2 teaspoons almond extract
2 to 3 teaspoons water

Method

  1. Preheat oven to 350° F.
  2. Cream sugar and butter together until fluffy. Add almond extract and beat until combined. Add flour and mix on low speed until mixture comes together in a dough-like ball.
  3. Roll dough into small balls, about 1 to 1.5". Place on cookie sheets lined with parchment paper. Flatten balls slightly with a spatula. Make indentations in the balls using your thumbs or the handle of a wooden spoon. Fill each cookie with about 1/4 teaspoon of jam. Chill cookie dough for about 15 minutes.
  4. Bake cookies for 15-18 minutes, or until lightly browned on bottom Cool on rack.
  5. To make Glaze, whisk icing sugar, extract and water together until smooth. Drizzle over cooled cookies. Makes about 4 dozen cookies.

Sunday, December 4, 2011

12 Days of Christmas Baking! Day 4: Nanaimo Bars

Day 4: Nanaimo Bars

Sweet 'n' creamy 'n' chewy; just like me.
Nanaimo bars, a no-bake layered bar dessert, are quintessentially Canadian and popular hereabouts around Christmas time. If you have insomnia, you can read more about the history of Nanaimo Bars here.

The bars take a lot of ingredients, but they are essentially easy to make. You make the bars in stages, starting with the base. Then, the creamy middle layer is spread over the base. Try not to eat any, I dare you. Finally, melted chocolate is poured over the top. Chill, slice, and inhale.

If these are new to your understanding, please make them and let me know how you liked them! They are a favourite around here, and don't last long.

Nanaimo Bars
Based on a recipe by Deanna Horn
Makes one 9 x 13 inch tray of bars

Ingredients
Base
1 cup butter
1/2 cup granulated sugar
10 tablespoons cocoa powder
1 teaspoon vanilla
2 eggs, lightly beaten
2 cups sweetened shredded coconut
1 cup sliced almonds
1 cup graham cracker crumbs

Middle Layer
1/2 cup butter
4 cups icing sugar, sifted
4 tablespoons vanilla custard powder
6 tablespoons milk

Top Layer
1/2 cup butter
8 oz. bittersweet chocolate, chopped

Method
Prepare Base
In a saucepan on medium heat, melt butter, sugar, cocoa and vanilla together and stir until smooth. Add beaten eggs, stir until combined; remove from heat. Add coconut, almonds and graham cracker crumbs; stir together. Spread mixture onto the bottom of a 9 x 13 inch pan. Refrigerate. 

Prepare middle layer
In a stand mixer, cream butter until light and fluffy. Add icing sugar and custard powder. Cream together until light and fluffy. Add milk, beat on medium high until fluffy. Spread over base layer. Refrigerate.

Prepare top layer Melt chocolate and butter together, mix until smooth. Pour over middle layer and spread evenly to coat. Refrigerate.
Cut into bars and enjoy.

**Edited to fix the instructions for preparing the base. Thanks, all of you who pointed it out!

Saturday, December 3, 2011

12 Days of Christmas Baking! Day 3: Easy Shortbread

Day 3: Easy Shortbread


Nice cookies, lady
Real Scottish shortbread should be an extremely sturdy, robust, buttery cookie. I admit, the real thing is often too tough for me to enjoy. Some recipes I have found to be labour-intensive. I like this easy version, because the tiny cookies instantly melt in your mouth. Light and delicate, they still pack a buttery punch in the face. Who doesn't enjoy a buttery punch in the face?

Did I mention that they were easy? Easy to make, you naughty minx! Heave all the ingredients into a mixer, and turn that bad boy on for ten minutes. You can do a lot in ten minutes, such as drink two cocktails and subsequently tweet about it.

Pipe the batter onto parchment paper, in a shape that pleases you. I have made moundy swirls, and chunky S-shapes. When the cookies are done, you can carefully dip them in melted chocolate. Trust me, they are addictive!

Easy Shortbread
Adapted from Best of Bridge


Ingredients
1 cup butter
1/2 cup icing sugar
1 1/2 cups all-purpose flour

Method
  1. Pre-heat oven to 350°F. 
  2. In a stand mixer, cream butter and sugar together until fluffy. 
  3. Add flour and stir until thoroughly mixed. Beat on medium high speed for 10 minutes. Mixture will be very pale and very fluffy. 
  4. Scrape mixture into a pastry bag fitted with a star tip. Pipe 2" mounds onto parchment paper about 2" apart. 
  5. Bake for 10-12 minutes, or until bottoms start to turn golden brown. Cool slightly in pan, then transfer to a wire rack to cool completely. 
  6. Drizzle cooled cookies with melted chocolate for an option. 

Makes about 3 dozen cookies.

Friday, December 2, 2011

12 Days of Christmas Baking! Day 2: Chocolate Marshmallow Fudge

Day 2: Chocolate Marshmallow Fudge
Here come the fudge!

When we were growing up, my sister and I had a specific Christmas baking duty:

Stir The Fudge Pot

We had a special pot for it and everything: The Fudge Pot. An ancient, heavy-bottomed stock pot — whose bakelite handles had long-since shattered and flaked away; ancient burnt sugar stains flecked the pitted bottom. And a special Fudge Spoon — a warped but very sturdy wooden spoon.

We would stand on chairs, stirring and stirring, while the fudge got thicker and thicker, until our tiny arms were burning. It was only six minutes, but it seemed to take forever. Time stood still and it was the NOWness of the bubbling sugar, and the endless, endless, stirring, that filled my whole frontal lobe.

"Is it time yet?" we would call. "No, four minutes left," Mom would say patiently.

The sugary mixture got darker and darker. Bubbles blatted their way to the surface, one after the other.

Three minutes, two minutes, one minute left. Sweat on our brows, we would whine, "I can't do it!" and suddenly the fudge would be done. Quickly! Quickly! Throw in butter, chocolate and vanilla. Quickly! Stir, stir, stir. Quickly! Pour that stiffening chocolate wonderfulness into the pan. It smelled like some kind of heaven.

The best part? We always got to lick the spoon. Always.

I am not sharing.


Chocolate Marshmallow Fudge
by Barbara Rogalsky

Ingredients
3/4 cup evaporated milk
2 cups granulated sugar
About 20 large marshmallows (5.5 oz)
1/2 cup butter
6 oz. bittersweet chocolate, chopped
1 teaspoon vanilla

Method

  1. In a large, heavy-bottomed stock pot, mix together evaporated milk, sugar and marshmallows.
  2. Bring to a boil over medium heat, stirring constantly until mixture is bubbling and marshmallows begin to melt.
  3. Once bubbling, allow turn heat down to just below medium and continue boiling for exactly 6 minutes. Mixture will start to turn golden.
  4. Remove from heat and immediately stir in butter, chocolate and vanilla.
  5. Pour into an 8 x 8 inch pan lined with parchment paper or aluminum foil. Chill to firm up in refrigerator. Cut into 1 inch squares, serve at room temperature.


Options
Swap bittersweet chocolate for dark chocolate, mint chocolate, etc. Add different flavorings instead of vanilla, for example, maple or coffee.

Thursday, December 1, 2011

12 Days of Christmas Baking! Day 1: Church Windows

Welcome to Let Them Eat Cake's 12 Days of Christmas Baking!

Christmas is coming — don't you smell the chestnuts roasting?

DON'T YOU ?!?

No need to panic. As my Christmas gift to you, I will post a new Christmas baking treat every day for the next 12 days. Coming up: cookies, candies, bars and lots of chocolate! I hope you will find a recipe to share with your family and friends, and become part of your holiday baking repertoire.

My mother loved Christmas. As children, my sister and I would be her helper elves. We would be her baking assistants in the kitchen, cutting and decorating cookies or stirring fudge; we would sit together at the kitchen table making hand-made ornaments for the tree; and she would help us make hand-made gifts for each other. We would listen to Christmas music albums: Bing Crosby and Harry Belafonte crooned while we drank hot cocoa with tiny marshmallows. Some of the ornaments we made still exist and now grace my Christmas tree each December.

We lost our Mom to cancer 18 years ago, but we still continue her traditions as much as we can today. She taught us that the season is about sharing and family and making do with what you have. May you find warm moments of peace and friendship, no matter how hectic and stressful life can get.

Much love,
Lulu

Churchy church windows are churchy. Delicious, without the pesky broken glass and lead poisoning. You're welcome.


Day 1: Church Windows


Chocolatey slices of colorful marshmallows resemble stained-glass windows, and the coating of shredded coconut is reminiscent of a light dusting of Christmas snow. This no-bake slice is one of my favourite Christmas treats, and is something that my Mom, my sister and I would make together every year.

Church Windows
by Barbara Rogalsky

Ingredients
4 oz. semi-sweet chocolate, melted and cooled slightly
2 tablespoons butter
1 egg, beaten lightly
1 cup icing sugar
4 cups miniature coloured (fruit-flavoured) marshmallows
1 teaspoon vanilla
1/3 cup chopped walnuts (optional)
1/2 cup sweetened shredded coconut


Method
  1. Melt chocolate with butter, cool slightly. Mix in beaten egg, stir until combined. Stir in icing sugar and vanilla until combined. Fold in marshmallows and nuts (if using).
  2. Spread mixture on a large piece of parchment or wax paper. Using the wax paper, form mixture into a rolled log about 4" thick. Coat with coconut.
  3. Freeze log for about an hour. Remove from freezer and slice into 1/2" thick slices. Keep church windows in a sealed container and refrigerated. 
Makes about 2 dozen slices.

Special thanks to Lesa, Mimi and Cam for being my kitchen assistants; and to Robin, ÜberHusband, for taking such brilliant photographs and being generally awesome.