Showing posts with label marshmallow. Show all posts

Friday, December 2, 2011

12 Days of Christmas Baking! Day 2: Chocolate Marshmallow Fudge

Day 2: Chocolate Marshmallow Fudge
Here come the fudge!

When we were growing up, my sister and I had a specific Christmas baking duty:

Stir The Fudge Pot

We had a special pot for it and everything: The Fudge Pot. An ancient, heavy-bottomed stock pot — whose bakelite handles had long-since shattered and flaked away; ancient burnt sugar stains flecked the pitted bottom. And a special Fudge Spoon — a warped but very sturdy wooden spoon.

We would stand on chairs, stirring and stirring, while the fudge got thicker and thicker, until our tiny arms were burning. It was only six minutes, but it seemed to take forever. Time stood still and it was the NOWness of the bubbling sugar, and the endless, endless, stirring, that filled my whole frontal lobe.

"Is it time yet?" we would call. "No, four minutes left," Mom would say patiently.

The sugary mixture got darker and darker. Bubbles blatted their way to the surface, one after the other.

Three minutes, two minutes, one minute left. Sweat on our brows, we would whine, "I can't do it!" and suddenly the fudge would be done. Quickly! Quickly! Throw in butter, chocolate and vanilla. Quickly! Stir, stir, stir. Quickly! Pour that stiffening chocolate wonderfulness into the pan. It smelled like some kind of heaven.

The best part? We always got to lick the spoon. Always.

I am not sharing.


Chocolate Marshmallow Fudge
by Barbara Rogalsky

Ingredients
3/4 cup evaporated milk
2 cups granulated sugar
About 20 large marshmallows (5.5 oz)
1/2 cup butter
6 oz. bittersweet chocolate, chopped
1 teaspoon vanilla

Method

  1. In a large, heavy-bottomed stock pot, mix together evaporated milk, sugar and marshmallows.
  2. Bring to a boil over medium heat, stirring constantly until mixture is bubbling and marshmallows begin to melt.
  3. Once bubbling, allow turn heat down to just below medium and continue boiling for exactly 6 minutes. Mixture will start to turn golden.
  4. Remove from heat and immediately stir in butter, chocolate and vanilla.
  5. Pour into an 8 x 8 inch pan lined with parchment paper or aluminum foil. Chill to firm up in refrigerator. Cut into 1 inch squares, serve at room temperature.


Options
Swap bittersweet chocolate for dark chocolate, mint chocolate, etc. Add different flavorings instead of vanilla, for example, maple or coffee.

Thursday, December 1, 2011

12 Days of Christmas Baking! Day 1: Church Windows

Welcome to Let Them Eat Cake's 12 Days of Christmas Baking!

Christmas is coming — don't you smell the chestnuts roasting?

DON'T YOU ?!?

No need to panic. As my Christmas gift to you, I will post a new Christmas baking treat every day for the next 12 days. Coming up: cookies, candies, bars and lots of chocolate! I hope you will find a recipe to share with your family and friends, and become part of your holiday baking repertoire.

My mother loved Christmas. As children, my sister and I would be her helper elves. We would be her baking assistants in the kitchen, cutting and decorating cookies or stirring fudge; we would sit together at the kitchen table making hand-made ornaments for the tree; and she would help us make hand-made gifts for each other. We would listen to Christmas music albums: Bing Crosby and Harry Belafonte crooned while we drank hot cocoa with tiny marshmallows. Some of the ornaments we made still exist and now grace my Christmas tree each December.

We lost our Mom to cancer 18 years ago, but we still continue her traditions as much as we can today. She taught us that the season is about sharing and family and making do with what you have. May you find warm moments of peace and friendship, no matter how hectic and stressful life can get.

Much love,
Lulu

Churchy church windows are churchy. Delicious, without the pesky broken glass and lead poisoning. You're welcome.


Day 1: Church Windows


Chocolatey slices of colorful marshmallows resemble stained-glass windows, and the coating of shredded coconut is reminiscent of a light dusting of Christmas snow. This no-bake slice is one of my favourite Christmas treats, and is something that my Mom, my sister and I would make together every year.

Church Windows
by Barbara Rogalsky

Ingredients
4 oz. semi-sweet chocolate, melted and cooled slightly
2 tablespoons butter
1 egg, beaten lightly
1 cup icing sugar
4 cups miniature coloured (fruit-flavoured) marshmallows
1 teaspoon vanilla
1/3 cup chopped walnuts (optional)
1/2 cup sweetened shredded coconut


Method
  1. Melt chocolate with butter, cool slightly. Mix in beaten egg, stir until combined. Stir in icing sugar and vanilla until combined. Fold in marshmallows and nuts (if using).
  2. Spread mixture on a large piece of parchment or wax paper. Using the wax paper, form mixture into a rolled log about 4" thick. Coat with coconut.
  3. Freeze log for about an hour. Remove from freezer and slice into 1/2" thick slices. Keep church windows in a sealed container and refrigerated. 
Makes about 2 dozen slices.

Special thanks to Lesa, Mimi and Cam for being my kitchen assistants; and to Robin, ÜberHusband, for taking such brilliant photographs and being generally awesome.

Friday, October 28, 2011

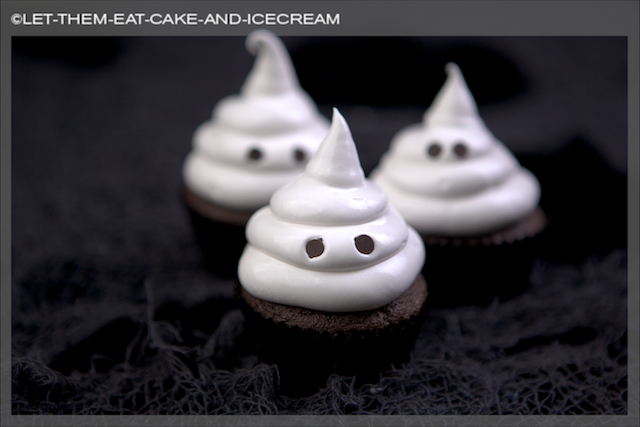
Marshmallow Ghost Cupcakes

Absolutely adorable marshmallow ghosts float spookily above dark but divine devil's food cupcakes! A cute but scary treat for your Halloween bash. The sweet, glossy marshmallow frosting sounds complicated but it's pretty easy. For best results, make the frosting the same day you will serve them. Enjoy!

Cute marshmallow ghosties will haunt your tastebuds!